Table of Contents
What is a ‘Shrinking Sticky Header’?
Shrinking Header, as the name suggests, is a smaller version of your site’s header. And when the word ‘Sticky’ is added to it which means to stick then it becomes ‘Shrinking Sticky Header’.
So now you must have understood that the shrinking and sticking of the header on scrolling is called ‘Shrinking Sticky Header’.
Why ‘Sticky Header’ is important for your website?
These days you will see this feature in many sites.
Suppose you are reading an article on a website and you have scrolled down to the bottom of the page while reading that article. Now you do not want to read that article further and want to navigate to another page of the website. Now you do not have to scroll back up, for that you will find the ‘Sticky Header’ or ‘Shrinking Sticky Header’ feature very useful. With the help of this you can navigate to any other page at any time from anywhere. It will save your time.
How to create ‘Sticky Header’ for your website with Elementor?
I will explain how to create a sticky header with Elementor.
First of all, you will have to create or build your website header in Elementor page builder.
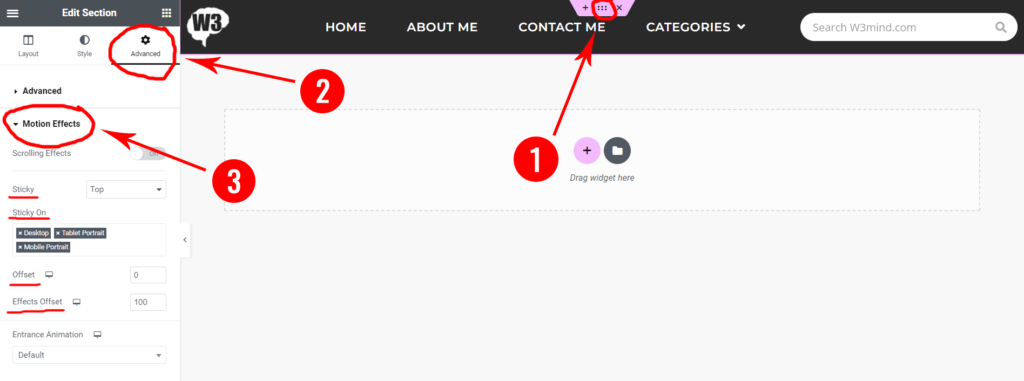
Now select to edit your Section and navigate to the Advanced tab and select Motion Effects. Then, in the Sticky option, select Top.
There are some settings you can set according to your requirement.
After selecting the settings as shown in the screenshot, your header will be sticky.
Creating ‘Shrinking Sticky Header’ with Elementor
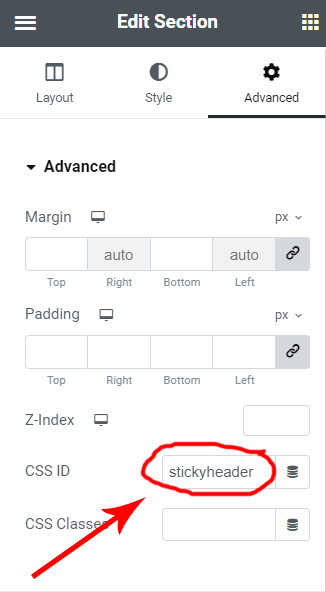
If you want to Shrink the logo when you scroll down you can use the following CSS. By doing this your header will shrink because we are going to shorten the logo height.
					/* shrinking logo image */

#stickyheader img {
	width: 150px!important;
	transition: all .2s linear!important;
	-webkit-transition: all .2s linear!important;
	-moz-transition: all .2s linear!important;
}

#stickyheader .elementor-sticky--effects img {
	width: 120px!important;
	transition: all .2s linear!important;
	-webkit-transition: all .2s linear!important;
	-moz-transition: all .2s linear!important;
}
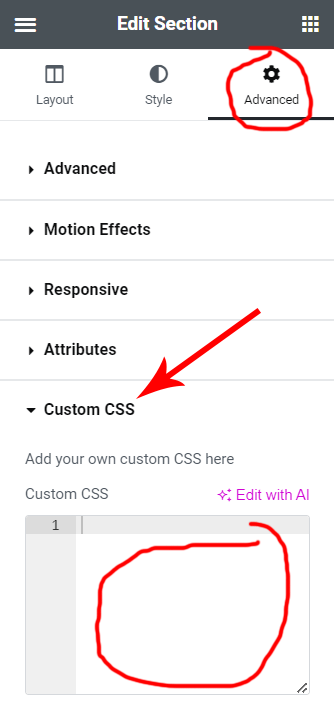
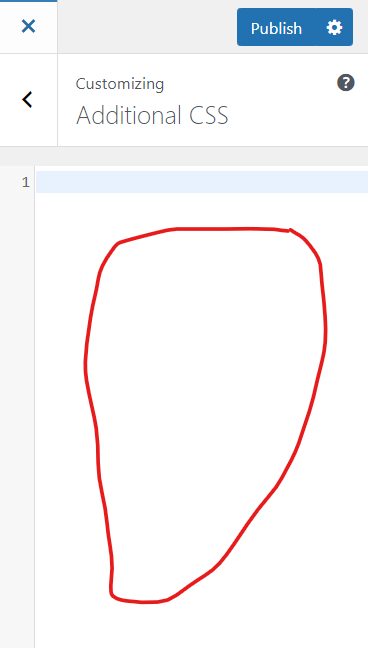
You can add above CSS to the Customizer or in Elementor’s CSS located in Elementor Settings. See the images below.
I hope you enjoyed this article.
Have you encountered any problems? You can reach out to me via email or contact me.
To know more interesting facts about WordPress plugins, please subscribe to our YouTube Channel and you can also follow W3Mind on Facebook.